Paneer Tikka is a very popular finger snack in North India. Every gathering or wedding will have Paneer Tikka served. Fortunately it’s easy to make too.
| Preparation Time: | 3 hours |
| Cooking time: | 10 minutes |
| Servings: | 8 |
| Difficulty: | Easy |
Ingredients
| Paneer | 1/2 kg |
| Dahi (yogurt or curd) | 2 cups |
| Salt | 1 tsp |
| Red chilli powder (lal mirch) | 1 tsp |
| Kitchen Masala King | 1 tsp |
| Kasoori methi (dried fenugreek leaves) | 1 tsp |
| Chaat masala (available in Indian stores) | 1 tsp |
| Fresh coriander leaves | 1/4 cup |
| Grated Ginger | 1 tsp |
| Vegetable oil | 1 tbsp |
Method
- Cut paneer in 1/2 cm thick large pieces. You want large pieces so that they are easy to grill.
- Hang yogurt in a muslin cloth so that excess water is drained.
- Mix all the spices in the yogurt.
- Slowly dip paneer pieces in yogurt mixture and store in a container. Make sure paneer is fully coated with yogurt. If the mixture is too thick, add some drained yogurt water.
- Leave the paneer pieces in yogurt mixture for at least a couple of hours.
- Heat a large nonstick pan. Add a little oil. Now carefully lay paneer pieces in the pan. Let it cook on high heat. Do not turn or toss.
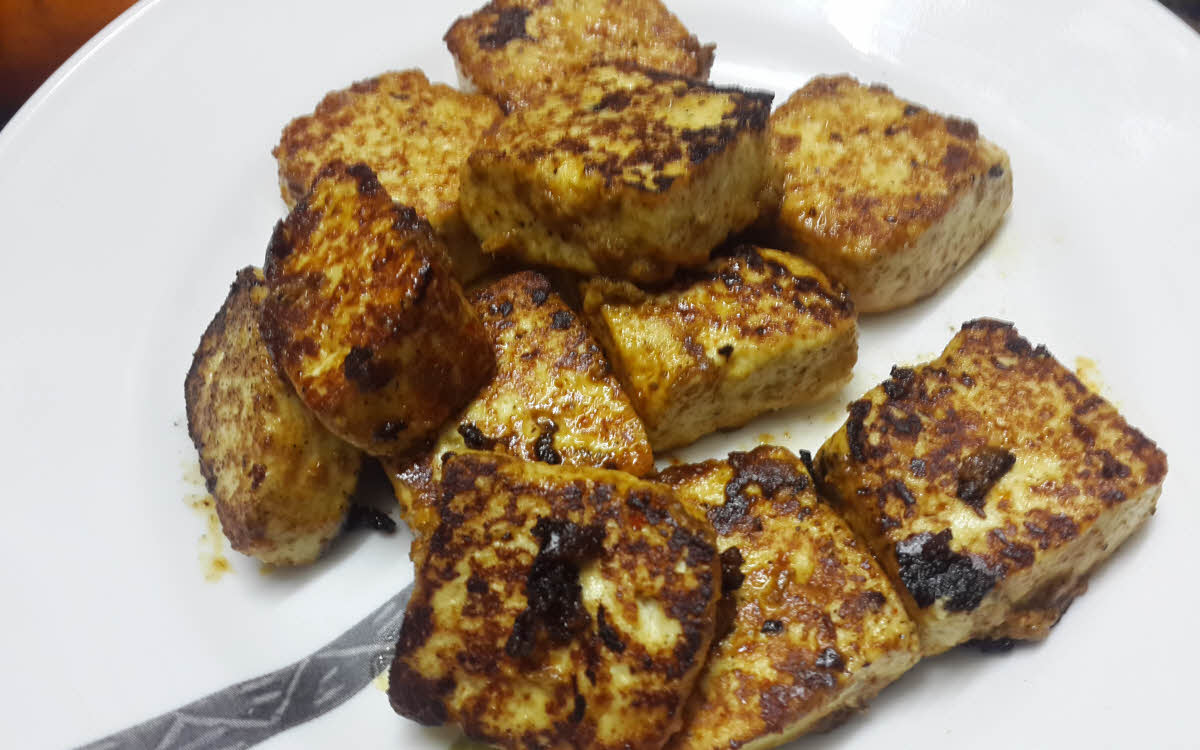
- Flip the pieces carefully one by one after they are slightly brown at the bottom (in about 1 minute). Cook the other side for another minute. Paneer will be brown from outside and soft from inside.
- Paneer Tikka is ready. Serve immediately with the your choice of chutney.


Notes
- I did not really grill the paneer but you can barbecue it or you can broil it in a conventional oven. I prefer stove and pan because it’s much simpler and very fast.
- You can add any spices that you like for marination like kasoori methi, barbecue masala etc.
- Make sure that you cook paneer on high heat only. It becomes rubbery if cooked on slow heat. Add it to the pan only when pan is sufficiently hot.
Summary
Recipe Name
Paneer Tikka
Author Name
Ruchi Garg
Published On
Total Time
Average Rating
 Based on 4 Review(s)
This does work for an outside barbeque; just get a disposable aluminum pan and place it on the grill next to the other things you’re grilling, and cook the yogurt-dipped paneer in that.
In our recent company picnic, we kept the paneer and spiced yogurt in a covered container alongside the grill; each time we started some more grilled items, we added more paneer to the aluminum pan.
This worked really well, since it makes a great side dish as well as being a main dish in itself.